Ironing
Some cotton clothes get too wrinkled when washed and need to be ironed. To iron these clothes, set the ironing temperature to medium and always iron the clothes inside out. If you are worried about burning your clothes, you can put another cloth between the iron and the cotton clothes. Extremely high temperature when ironing can burn cellulose fibers. Burning or yellowing of the cloth occurs when the fibers of the cloth begin to burn. If you want the cloth to be starched after ironing, use a starching spray while ironing. To starch the shirts, you need to use liquid starch. You can also use fumigator or hang clothes in a steam bath to remove wrinkles on cotton clothes. This will not make your clothes look starchy, but it will remove large wrinkles.
Requirements
A steam iron
A spray bottle
Clean drinking water
(No starch required)
Our renowned Signature Finish will take much of the work out of ironing – by ironing in the right order, and the right way, you can achieve a perfectly crisp result quickly and with precision. A garment-washed shirt on the other hand, undergoes a delicate wash cycle to get a softer, more worn-in finish. So, the goal here isn’t a perfectly smooth look, but a smart one: perfect in its own way.
1. Lay the groundwork
As the saying goes (a few seconds of) preparation is the key to success. A damp, newly washed shirt is perfect for ironing, but lightly dampen any dry shirts for a quicker, smoother process — and result.
2. Collar
Set your iron to medium heat for a crease-resistant shirt, and low heat (usually, please check the care label) for a garment-washed or knitted dress shirt. Iron the back of the collar first. Think precision: start with the points and move inwards and down towards the collar stand as you go. Turn the collar over and repeat.
3. Cuffs
Unbutton the cuff. Iron on the outside only, repeating the process of going from the edges and in for a crisp result. If it is a single cuff, iron around the button as they can leave a mark.
4. Yoke
Reset your iron and use plenty of steam from here on. Place the back yoke sideways on the top end of the ironing board. Iron from the edges in.
5. Back
Rotate the shirt to iron the lower part of the back in the same way.
6. Front x 2
Place either side of the front on the ironing board, and iron — taking care to iron around the buttons again.
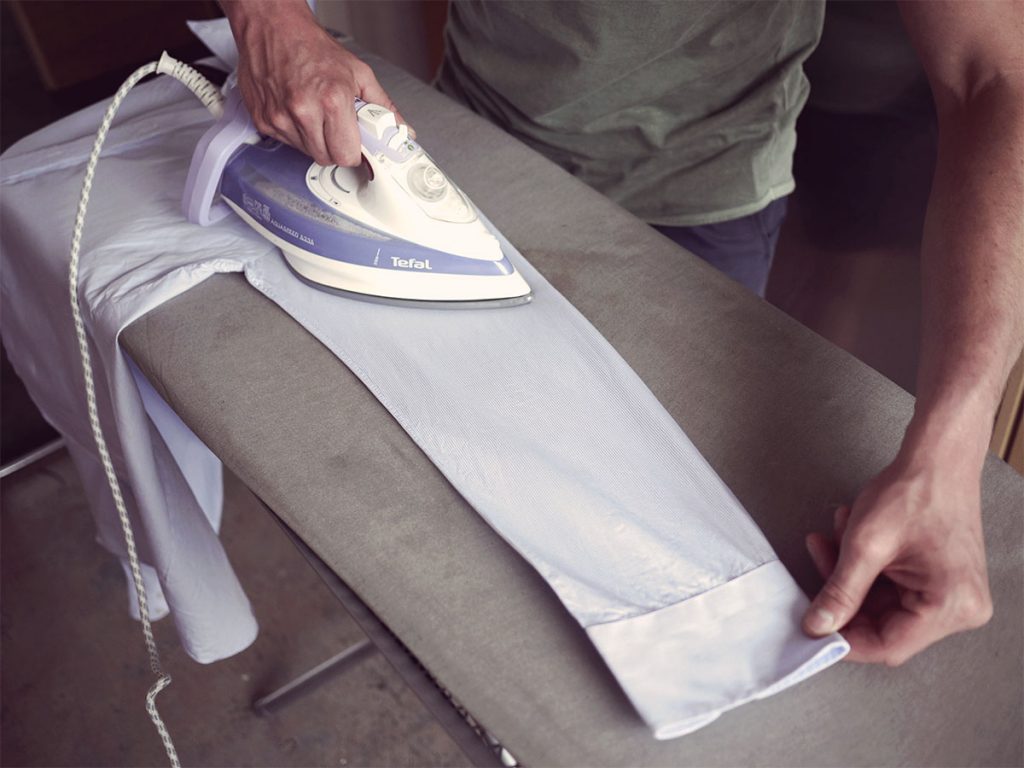
7. Sleeves x 2
If you have a sleeve board, congratulations. If not, don’t worry: the trick to ironing double layers of fabric is to make sure it lays flat before you iron. Avoid a crease along the sleeve by placing it a few millimeters over the edge of the board. Iron from the top down, ending by the cuffs.
Have a few tricks up your sleeve:
When travelling or when time is short, refresh and smoothen your shirt by hanging it on a good hanger in the bathroom while you shower. The steam will quite literally steam it. (When it comes to our knitted dress shirts and polo shirts in knitted piqué, this may be all they need).
Don’t iron. We are known for our Signature Finish for a reason. You may not need to iron a lightly wrinkled crease-resistant shirt: your body heat will sort out the creases.